Previously we’ve shared how our online learners value lightboard videos for their clarity, immediacy, and the strong sense of presence they create with the lecturer. While the end result feels natural and engaging, stepping behind the glass can feel anything but, especially for those new to the setup. So our Senior Video Producer – Oliver Hodgkins and I have compiled practical, experience-backed advice from academics and videographers to help you confidently plan, present, and teach with the lightboard. Whether you’re tackling complex diagrams or introducing key terminology, this guide will help you make your next lightboard video effective and engaging.
1. Choose the right tool for the job
Before stepping into the studio, ask yourself: is the light board the right tool for the lesson? It lends itself to topics where there are processes to explain, or diagrams to draw:
New vocabulary and terminology Whether in a language course or a subject-specific context, seeing unfamiliar words written out as they’re introduced can significantly aid comprehension and retention. The lightboard allows you to synchronise speech and writing, helping learners connect pronunciation, spelling, and meaning in real time.

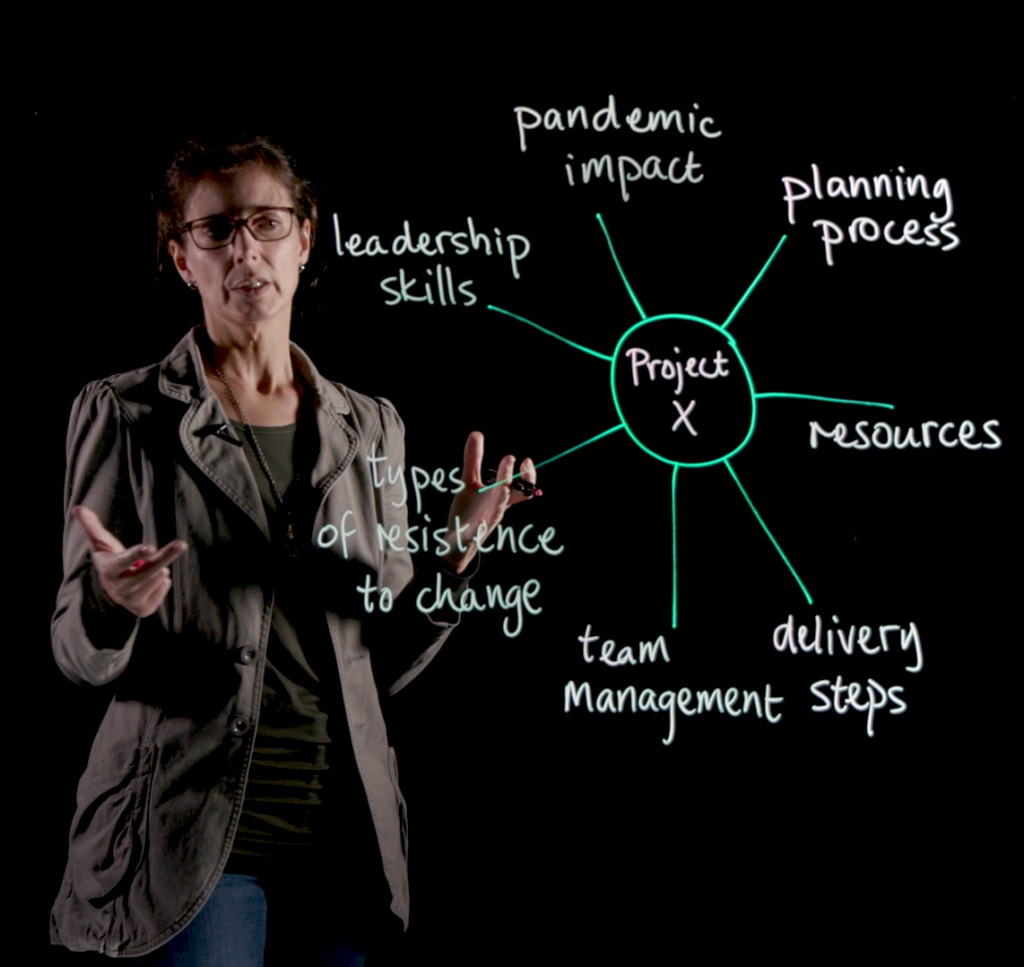
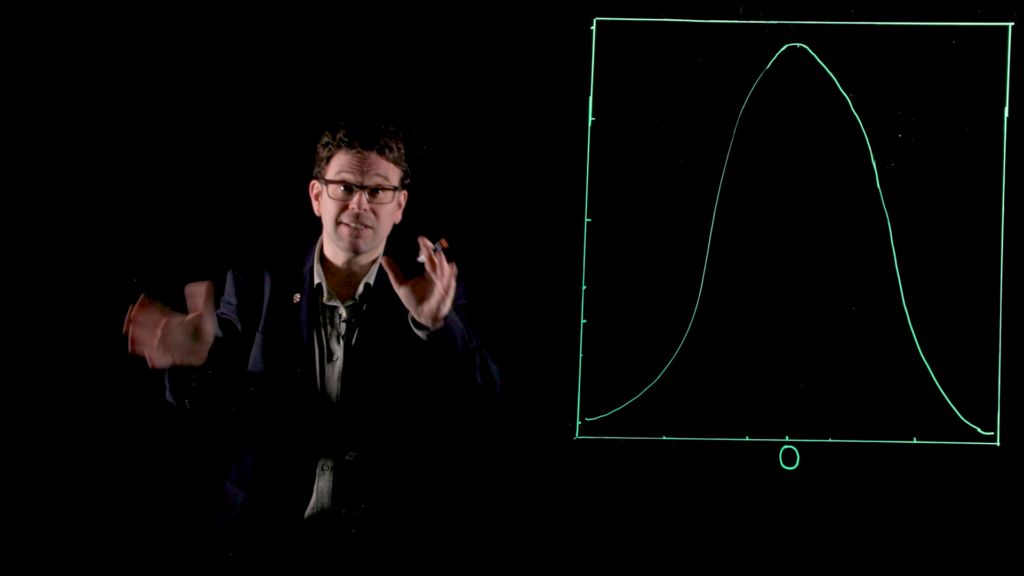
Diagrams, graphs and processes Draw diagrams, graphs and visual representations while you’re explaining them. This live construction reinforces understanding by synchronising the visual development of the diagram with your verbal explanation.

Flowcharts Build up a flowchart on the glass to show processes and relationships. As you draw each element you can talk through the logic and rationale behind each step, helping learners see not just the what, but the why of the process.
2. Prepare
A well-planned approach will help you feel more confident and make the filming process smoother. It will also help enormously when it comes to editing and continuity.
Expect the occasional slip-up – it’s part of the process! One helpful strategy is to plan your lecture in short, manageable segments. This way, if you make a mistake, it’s easy to pause and retake just that section, without losing flow or having to start again.
Rehearse what you want to say We can’t use a teleprompter with the learning glass (it would cause a reflection) so practise what you want to say before stepping behind the glass. You will feel much more confident if you are familiar with your material.
Plan your diagram elements in advance Visualise what you’ll draw and how it will be arranged on the board. A well-planned layout ensures your diagrams remain clear, balanced, and easy to follow as you progress through the lecture. Consider the order in which elements will appear, how much space each part will need, and how your positioning might impact visibility. By mapping this out in advance, you can avoid clutter, prevent overlapping content, and maintain a logical visual flow that supports your spoken explanation.

One needs to practise a bit before the shooting. Consider how you arrange your writing so that the output is legible, but also elegant. Although I had practised with a diagram, I ended up dissecting a circle into slightly uneven sectors, which was a bit disappointing – I consider myself to have a ‘good hand’ as I have been creating graphic novels in a previous lifetime. So, practice is a must! Dr Konstantinos Mersinas, MSc Cyber Security
Draw foundational elements before recording starts This reduces the pressure of getting them perfect in real time and improves clarity for students. We have spirit levels, set squares, and large rulers to help! Then you can focus your energy on delivering a clear, confident explanation and building upon the visuals as you teach.
Think about what to wear Wear something that does not distract learners from the material on the learning glass. The professional lighting in the studio will really help with this, but what you wear is also important: a dark coloured top with no patterns or wording works really well.

3. Plan your use of space
Using the lightboard effectively isn’t just about what you say, it’s also about how you use the space. Strategic writing, clear layouts, and mindful positioning help students focus and follow along without distraction.
Organise your space Start writing at the top or side and move around the board systematically to avoid cluttering the glass. Remember to leave about one third of the glass free – a space for you to stand and address the audience in a scribble-free area
Keep it clear and simple Write legibly and in large letters so that it’s easy to read. Use keywords, bullet points, and simple diagrams to complement spoken explanations rather than overwhelm the glass with text.

4. Techniques to increase engagement
Beyond clear writing and structure, some simple strategies can help bring your lesson to life.
Explain while writing Narrate your thought process to help students follow along, synchronising your voice to the elements as you draw them. Providing a detailed audio description in the commentary is also good for accessibility.
Eye contact The light board is a fantastic tool to use in a lecture. It allows the lecturer’s enthusiasm to shine and their presence to be felt. One of the unique benefits is that you can maintain eye contact with your audience as you’re speaking and writing, so maintain regular eye contact with the camera to foster connection.
Avoid using colour alone to convey meaning While colour can enhance visual appeal, it shouldn’t be the sole method of communicating key information. Visually impaired learners, or those viewing your video on low-quality screens, may not be able to distinguish between colours. Instead, use additional cues such as shapes, labels, position, or annotations (e.g. underlining, circling, or pointing) to ensure all learners can access and interpret your content effectively.
5. Finishing touches
After filming, a few final touches can further enhance the effectiveness of your video. These small details contribute to accessibility, clarity, and a polished final product.
Supplementary materials For ease of reference and improved accessibility, offer downloadable notes, summaries, or slides to complement the lecture.
Flip the text! During the editing process, our studio team adjusts the contrast to optimise the appearance of the lecturer and their writing, and, importantly, flips the video so that the writing appear the right way round!


What do academics think?
With all these techniques in mind, you might wonder how feasible it really is for lecturers to adopt the lightboard and whether it’s worth the effort. Let’s hear from an academic who’s used it in practice.
Dr. Mersinas found that it helped him relax in front of the camera because the technology recreates a familiar in-classroom teaching style,
“It was a fun and enjoyable experience for me, maybe this has also to do with my old-school experience of teaching mathematics on a white- and even blackboard. But the tool itself if quite attractive in the first place. It’s a more dynamic and expressive experience in comparison to just standing in front of a camera; it probably gave me a more natural sense and style of delivery, and I think I felt an increased engagement with the materials (and thus, indirectly, asynchronously, with the audience too).” Dr Konstantinos Mersinas, MSc Cyber Security
Using a lightboard can be a powerful way to engage students, making complex ideas more accessible and fostering a stronger sense of connection in online learning. While it may seem daunting at first, careful planning, practice, and thoughtful use of space can create dynamic and effective videos. The advice from experienced lecturers and videographers highlights that with a little preparation, anyone can master this tool.
With thanks to Dr Konstantinos Mersinas, Professor Vikki Locke, and Dr James Adbey for permission to use their images, and for being our lightboard pioneers!